Page 217 - TesaKatalogen
P. 217
S urfa c e R oug h ness T esting

     The Roughness Parameters Most
     Commonly Used are: Ra, Rz and Rmax

     TESA RUGOSOFT and MEASUREMENT STUDIO Software
     These software tools allow the storage of surface roughness measurements along with
     roughness parameters and roughness profile. A measuring programme created in the sof-
     tware can be transferred to the instrument together with measuring parameters. The results
     are available at all times, complete with statistcal analysis and can be exported for reports,
     for example.

     Mean roughness Ra (ISO 4287, DIN 4768)
     The mean roughness Ra matches the arithmetical mean of the absolute values related to the
     profile deviation y within the reference length l.

     Max. profile valley depth Rmax (DIN 4768)
     The max. profile valley depth Rmax is for the most significant single roughness depth Zi
     within the total length lm.
     According to ISO 4288 and DIN 4287 - Part 1, this parameter is also specified as Ry max.

     Mean roughness depth Rz DIN (DIN 4768)
     The mean roughness depth Rz is the arithmetical mean of single roughness depths of suc-
     cessive sampling lengths le. According to ISO 4287 and DIN 4762, the parameter Rz DIN is
     also specified as Ry5.
     Since Rz changes its name in both DIN 4768 and ISO 4287, this parameter is also specified
     as Rz DIN or Rz ISO. If the parameter Rz is measured according to DIN, it is generally ad-
     mitted that the extreme value specified by ISO is matched providing that Rz ISO does not
     exceed Rz DIN.

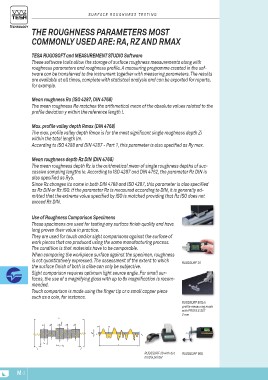
     Use of Roughness Comparison Specimens                                                                                RUGOSURF 20
     These specimens are used for testing any surface finish quality and have                                              RUGOSURF 90G in
     long proven their value in practice.                                                                                  profile measuring mode
     They are used for touch and/or sight comparisons against the surface of                                               with PROFILE SET
     work pieces that are produced using the same manufacturing process.                                                   2 mm
     The condition is that materials have to be comparable.                                                                RUGOSURF 90G
     When comparing the workpiece surface against the specimen, roughness
     is not quantitatively expressed. The assessment of the extent to which
     the surface finish of both is alike can only be subjective.
     Sight comparison requires optimum light source angle. For small sur-
     faces, the use of a magnifying glass with up to 8x magnification is recom-
     mended.
     Touch comparison is made using the finger tip or a small copper piece
     such as a coin, for instance.

     Z1                        lt                                           y  m
                  Z2                                             Ra 0                           l
                                 Z3Ie
                                      Rmax5 x le = lm
                                               Z4
                                                             Z5

                                                                                                   x

                                                                                                     RUGOSURF 20 with dot
                                                                                                     matrix printer

M-2

