Page 141 - TesaKatalogen
P. 141
C O MPAC D i a l T e s t I n d i c a t o r s

      COMPAC Dial Test Indicators

      Essential for the workshop, but also in the inspection room or measuring labora-
      tory – Ideal for comparative measurement on a surface plate – Detect form and
      position errors – Measure axial and radial runouts, especially.

                        Technical Features
                        –– Long measuring travel, up to 3 mm.
                        –– Bidirectional measuring, without reversing lever.
                        –– Same rotation direction of pointers in the two measuring
                        	 directions (clockwise pointer direction).
                        –– Swivelling probe through 180°.
                        –– Main pivot on self-aligning angular bearings, dimensioned
                        	oversize.
                        –– Dovetail mounting machined in the indicator housing.
                        –– Dull chrome-plated bezel and housing.
                        –– Rotating dial.
                        –– Insensitive to magnetic fields generated in mechanical
                        	workshops.

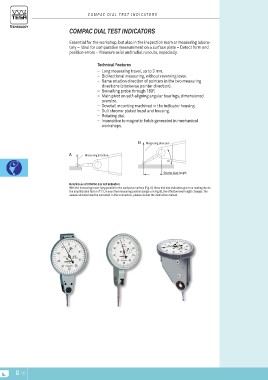
      A Measuring direction  B Measuring direction

                                                    α

                             Shorter lever length

      Note for use of COMPAC dial test indicators
      With the measuring insert lying parallel to the workpiece surface (Fig. A), these dial test indicators give true reading due to
      the amplification factor of 1:1. In any other measuring position (angle α in Fig. B), the effective lever length changes. The
      values indicated need be corrected. In this connection, please consult the instruction manual.

G-10

