Page 245 - TesaKatalogen
P. 245
H ei g ht Ga u g es                                       Factory standard
                                                                                         83 x 49 mm LC
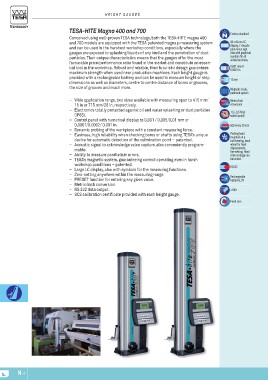
     TESA-HITE Magna 400 and 700                                                        display. 7-decade
                                                                                         plus minus sign.
     Conceived using well-proven TESA technology, both the TESA-HITE magna 400           Also with graphical
     and 700 models are equipped with the TESA patented magna μ measuring system         symbols for all
     and can be used in the harshest workshop conditions, especially where the           active functions.
     gauges are exposed to splashing liquids of any kind and the penetration of dust     0,001 mm or
     particles. Their unique characteristics means that the gauges offer the most        0.0001 in
     favourable price/performance ratio found in the market and constitute an essen-     12 mm
     tial tool in the workshop. Robust and reliable, their futuristic design guarantees  Magnetic scale,
     maximum strength when used near production machines. Each height gauge is           patented system
     provided with a rechargeable battery and can be used to measure height or step      Metric/Inch
     dimensions as well as diameters, centre to centre distance of bores or grooves,     conversion
     the size of grooves and much more.                                                 1,5 ± 0,5 N (at
                                                                                         switch point)
     –– Wide application range, two sizes available with measuring span to 415 mm/       500 mm/s 20 in/s
        16 in or 715 mm/28 in, respectively.                                             Probing head
                                                                                         mounted on a
     –– Electronics totally protected against oil and water splashing or dust particles  ball-bearing, hand
        (IP65).                                                                          wheel for head
                                                                                         displacement,
     –– Control panel with numerical display to 0,001 / 0,005/0,01 mm or                 fine setting. Head
        0,0001/0.0002/ 0.001 in.                                                         drive carriage can
                                                                                         be locked.
     –– Dynamic probing of the workpiece with a constant measuring force.                RS232
     –– Easiness, high reliability when checking bores or shafts using TESA’s unique     Rechargeable
                                                                                         batteries, 6V
        device for automatic detection of the culmination point – patented.              ≈ 60 h
     –– Acoustic signal to acknowledge value capture, also conveniently program-
                                                                                         Fixed zero
        mable.
     –– Ability to measure parallelism errors.
     –– TESA’s magnetic system, guaranteeing correct operating even in harsh

        workshop conditions – patented.
     –– Large LC display, also with symbols for the measuring functions.
     –– Zero-setting anywhere within the measuring range.
     –– PRESET function for entering any given value.
     –– Metric/inch conversion.
     –– RS 232 data output.
     –– SCS calibration certificate provided with each height gauge.

N-4

