Page 248 - TesaKatalogen
P. 248
Factory standard                               H ei g ht Ga u g es
83 x 49 mm LC
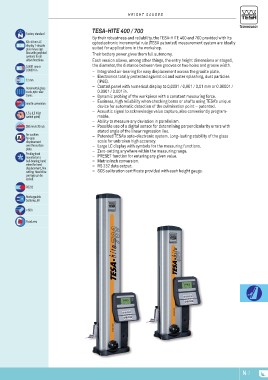
display. 7-decade    TESA-HITE 400 / 700
plus minus sign.
Also with graphical  By their robustness and reliability, the TESA-HITE 400 and 700 provided with its
symbols for all      optoelectronic incremental rule (TESA patented) measurement system are ideally
active functions.    suited for applications in the workshop.
0,0001 mm or         Their battery power gives them full autonomy.
0.00001 in           Each version allows, among other things, the entry height dimensions or staged,
                     the diameter, the distance between two grooves or two holes and groove width.
12 mm                –– Integrated air-bearing for easy displacement across the granite plate.
Incremental glass    –– Electronics totally protected against oil and water splashing, dust particles
scale, opto-elec-
tronic                  (IP65).
mm/In conversion     –– Control panel with numerical display to 0,0001 / 0,001 / 0,01 mm or 0.00001 /

1,5 ± 0,5 N (at         0.0001 / 0.001 in.
switch point)        –– Dynamic probing of the workpiece with a constant measuring force.
                     –– Easiness, high reliability when checking bores or shafts using TESA’s unique
500 mm/s 20 in/s
Air-cushion             device for automatic detection of the culmination point – patented.
for easy             –– Acoustic signal to acknowledge value capture, also conveniently program-
displacement
over the surface        mable.
plate.               –– Ability to measure any deviation in parallelism.
Probing head         –– Possible use of a digital sensor for determining perpendicularity errors with
mounted on a
ball-bearing, hand      stated angle of the linear regression line.
wheel for head       –– Patented TESA’s opto-electronic system. Long-lasting stability of the glass
displacement, fine
setting. Head drive     scale for unbroken high accuracy.
carriage can be      –– Large LC display with symbols for the measuring functions.
locked.              –– Zero-setting anywhere within the measuring range.
RS232                –– PRESET function for entering any given value.
                     –– Metric/inch conversion.
Rechargeable         –– RS 232 data output.
batteries, 6V        –– SCS calibration certificate provided with each height gauge.

≈ 60 h

Fixed zero

                                                                                                       N-7

