Page 253 - TesaKatalogen
P. 253
TESA IG-13                            H ei g ht Ga u g es                                         Factory standard
                                                                                                        Incremental glass
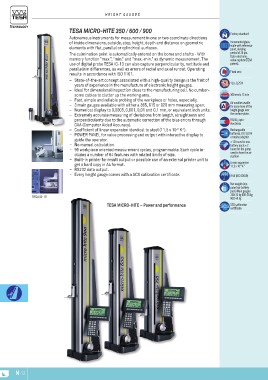
                  TESA MICRO-HITE 350 / 600 / 900                                                      scale with reference
                                                                                                        point, dividing
                  Autonomous instruments for measurement in one or two coordinate directions            period of 20 μm.
                  of inside dimensions, outside, step, height, depth and distance on geometric          Opto-electronic
                  elements with flat, parallel or cylindrical surfaces.                                 value capture (TESA
                  The culmination point is automatically entered on the bores and shafts - With         patent).
                  memory function "max.", "min." and "max.-min." as dynamic measurement. The            Fixed zero
                  use of digital probe TESA IG-13 can also capture perpendicularity, rectitude and
                  parallelism differences, as well as errors of radial and axial runout. Operating      1,6 ± 0,25 N
                  results in accordance with ISO 1101.
                  –– State-of-the-art concept associated with a high-quality design is the fruit of     300 mm/s 12 in/s
                                                                                                        Air cushion usable
                     years of experience in the manufacture of electronic height gauges.                for easy move of the
                  –– Ideal for dimensional inspection close to the manufacturing cell. No cumber-       height gauge over
                                                                                                        the surface plate.
                     some cables to clutter up the working area.                                        RS232, opto-
                  –– Fast, simple and reliable probing of the workpiece or holes, especially.           electronic
                  –– 3 main gauges available with either a 365, 615 or 920 mm measuring span.           Rechargeable
                  –– Numerical display to 0,0005, 0,001, 0,01 and 0,1 mm, or equivalent inch units.     batteries, 6 V, 3,0 Ah
                  –– Extremely accurate measuring of deviations from length, straightness and           or mains adapter
                                                                                                        ≈ 12 hours for one
                     perpendicularity due to the automatic correction of the bias errors through        battery pack; ≈ 2
                     CAA (Computer Aided Accuracy).                                                     hours for the pump
                  –– Coefficient of linear expansion identical to steel (11,5 x 10⁻⁶ K-1).              used to form the air
                  –– POWER PANEL for value processing and output with interactive display to            cushion
                     guide the operator.                                                                Linear expansion
                  –– No manual calculation.                                                             11,5 x 10⁻⁶ K-1
                  –– 99 workpiece oriented measurement cycles, programmable. Each cycle in-
                     cludes a number of 64 features with related limits of size.                        IP40 (IEC 60529)
                  –– Built-in printer for result output or possible use of an external printer unit to  Net weight (w/o
                     get a hard copy in A4 format.                                                      panel nor battery
                  –– RS232 data output.                                                                 pack) Main gauges
                  –– Every height gauge comes with a SCS calibration certificate.                       350: 33 kg 600: 38 kg
                                                                                                        900: 45 kg
                                           TESA MICRO-HITE – Power and performance                      SCS calibration
                                                                                                        certificate

N-12

